
“Hey babe, think you and I can do a concrete countertop in the basement?” Without hesitation, I responded, “Well, yea!” Seconds later, after processing what I just agreed to, I asked, “Wait, did you say a concrete countertop? Do it ourselves? Do you know how to do this?” My hubs replied, “Well, I found a guy on Youtube that walks through the process and I think we can do it.”
{Dramatic pause for some context} Those of you who know Corey, would know this idea wasn’t exactly out in left field. He is literally a jack of all trades who has never met a project he couldn’t conquer.
Okay, back to the story….If he says we can do it, well, let’s go! For some reason, I kept having mental pictures of us with giant sledgehammers when it was all said and done. What could go wrong?
Spoiler alert…..No sledgehammers were needed and although admittedly intimidating, the hubs and I turned out to be quite the team once got in a rhythm (He told me he liked the way I screeded! Oo la la! *wink*). The finished product isn’t perfect, but has “character.” However, I am extremely pleased. (So pleased, that I’d love to do a repeat in the boys’ bathroom)
I thought I’d share how we did it and our lessons learned in case you too have a wild hair.
Here is said “YouTube Guy.” (On a serious note: Watch this several times before you begin – he breaks it down into bite-sized steps that are easy to follow. Keep reading for the other video that was helpful as well)
Supplies We Used:
- Hardi Board
- Z Counterform Concrete Countertop Solutions Square Edge (Preforms)
- Z Counterform Concrete Countertop Solutions FG50 Fiber Mesh
- Z Counterform Concrete Countertop Solutions Z Clips
- Z Counterform Concrete Countertop Solutions 5/8 Construction Screw
- Z Counterform Concrete Countertop Solutions Z Liqui-Crete
- Sakrete Sand Mix (7 bags)
- Corded Drill
- Mixing Paddle Drill Attachment
- 5 gallon bucket
- Magnesium Float
- Steel Trowel
- Concrete Skreed (we used a 1x4x4 board)
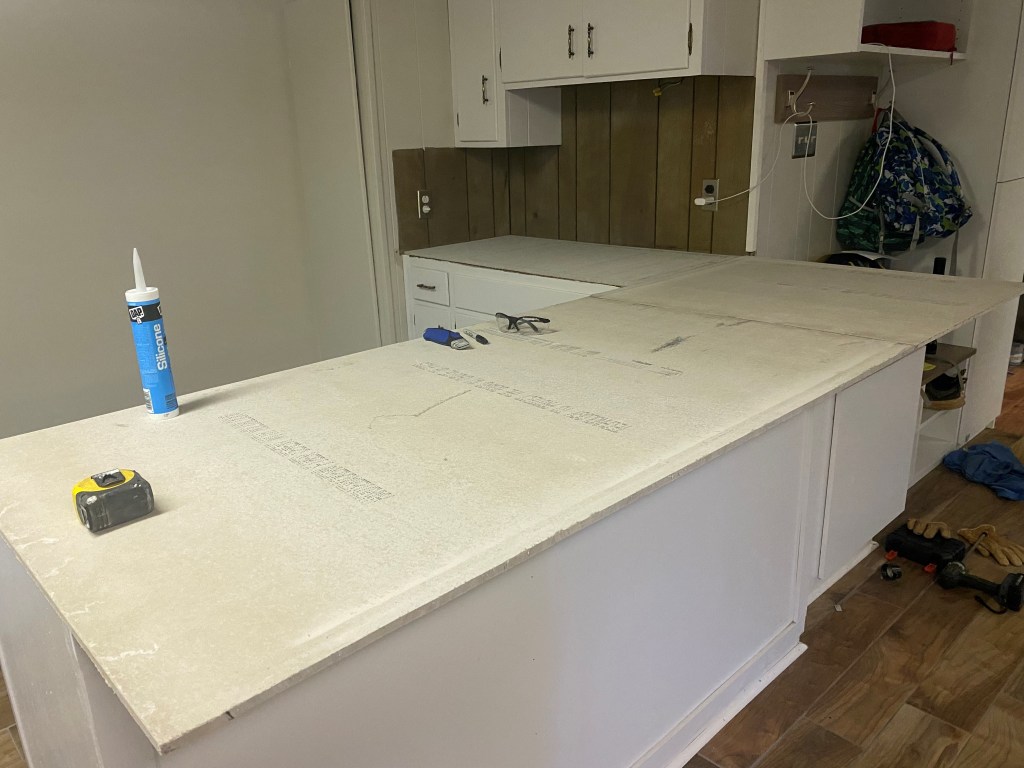
Step 1: Prep your surface
Corey demoed the old countertop. Then, he measured, cut and screwed down the Hardi board to create a ready surface for the new countertop.

Step 2: Secure your mold
Corey measured and cut the Z Counterform Concrete Countertop Solutions Square Edge Preforms. This creates a mold for your concrete pour. Once your preforms are screwed in place, use duct tape to seal the corners.
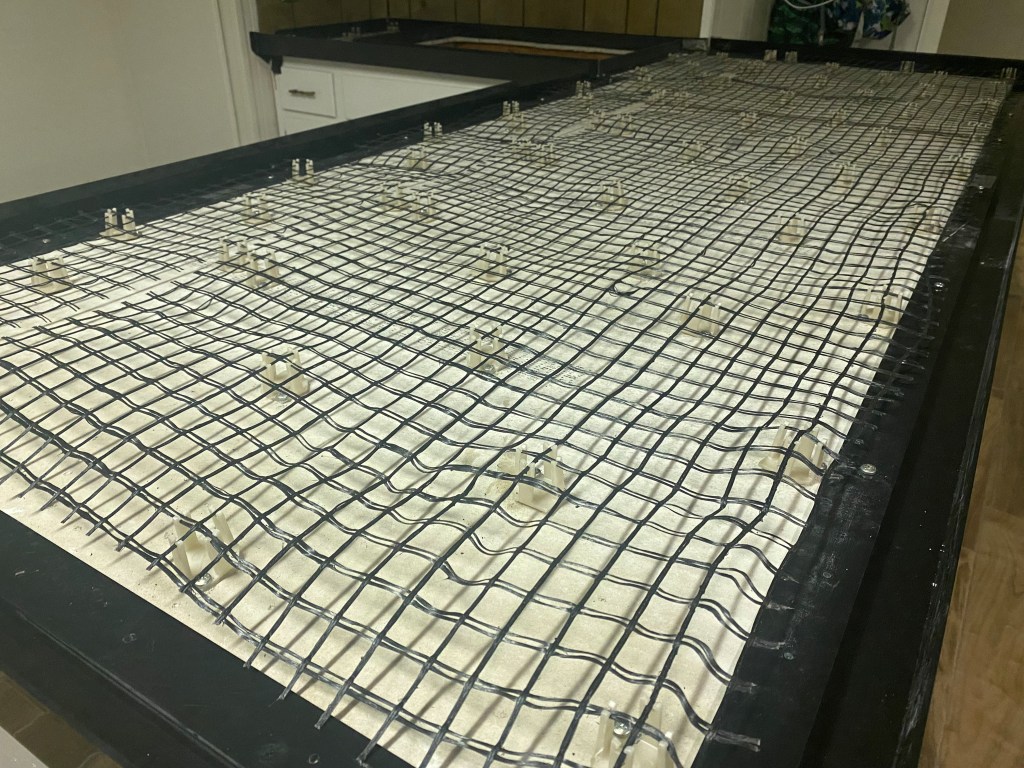
Step 3: Install the reinforcement mesh
To ensure that your countertop surface is reinforced, this system recommends the Z Counterform Concrete Countertop Solutions FG50 Fiber Mesh. The Z Clips, which suspends the mesh so that it’s in the middle of the hardened concrete post-pour, are placed every 4 inches or so and are secured by the construction screws. Once this step is complete, you’re prepped and ready for concrete!
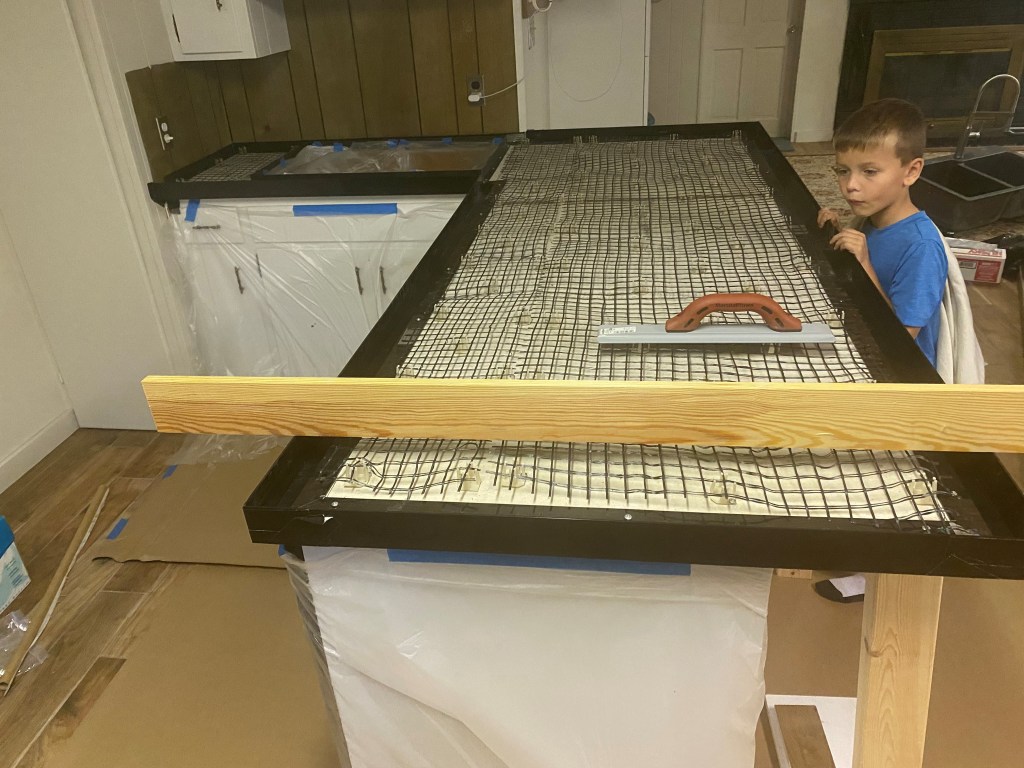
Step 4: Gather supplies & cover the floor and cabinets.
We taped down disposable butcher paper & sheet plastic to protect the surfaces around the countertops (Please note: you will spill!). This also created easier clean-up at the end. Gather all of your supplies before you start mixing concrete.
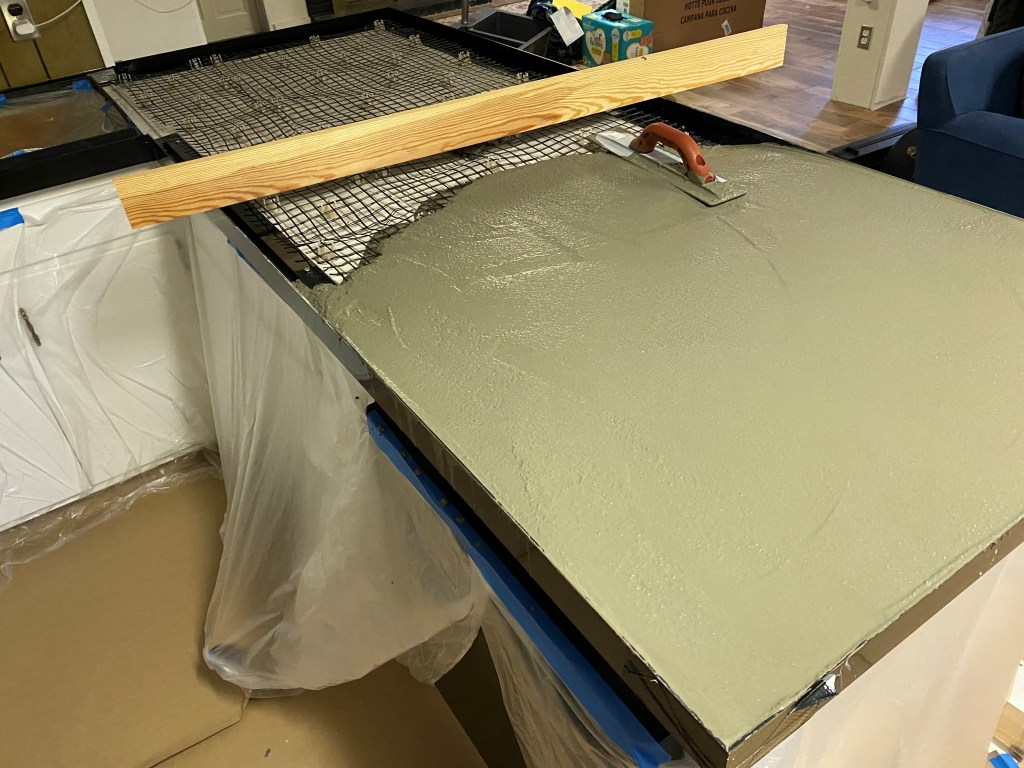
Step 5A: Mix, Pour, Screed & Repeat
Once you start, you can’t stop until you’re finished. Make sure you have at least 5 hours (more if your surface is larger or if you’re super nervous or meticulous). The pour process seemed to work best with one person responsible for mixing (Corey), while the other is screeding & driving the magnesium float (Yours truly). You will mix 5 gallons of concrete at a time – 1 bag of concrete mix, plus 1 bag of Z Liqui-Crete (a fibrous material that strengthens the concrete) and water to make your mix the consistency of cake batter (5L worked like a champ for us).
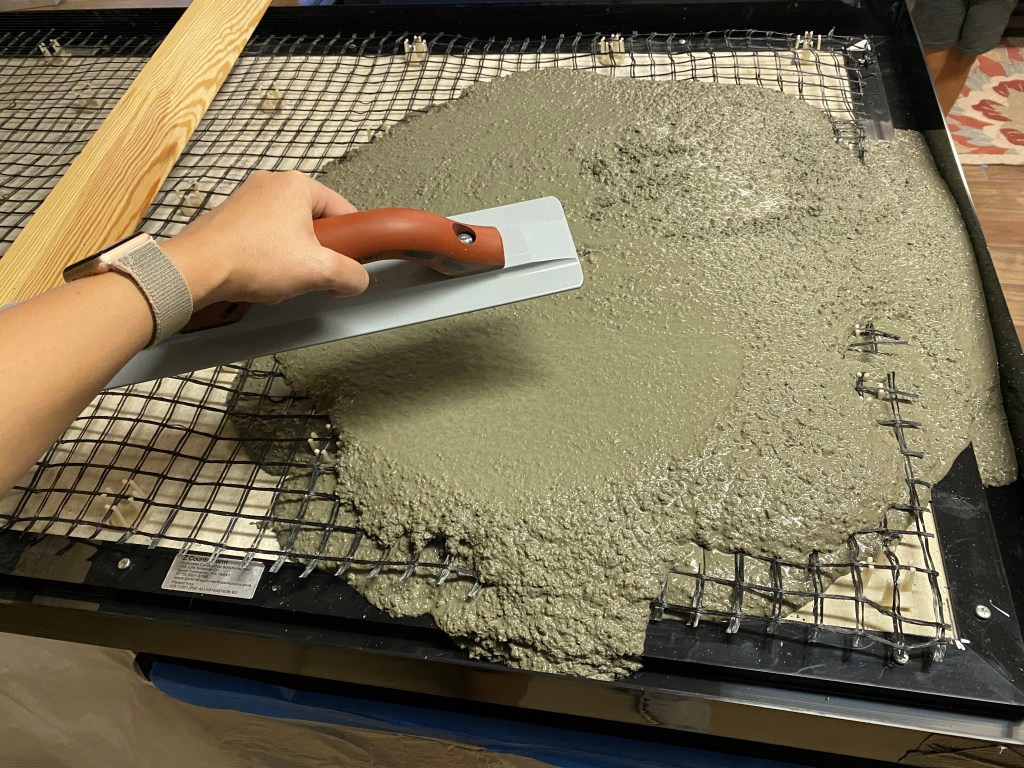
Step 5B: Mix, Pour, Screed & Repeat
Fill the corners and edges first. Use the concrete screed to ensure your surface is level. This part is very forgiving so keep working with it until you have an even, fully filled mold. Use the handle of a screwdriver to tap the outside of the preform edges to allow airbubbles to rise to the surface (This is important: If you skip this step, your outside edges will have holes/pits!). Mix, pour, screed, float & repeat until your countertop mold is fully filled. Once your pour firms up a bit, use your Magnesium Float to smooth & even out the surface. This video was really helpful in getting the hang of the technique.
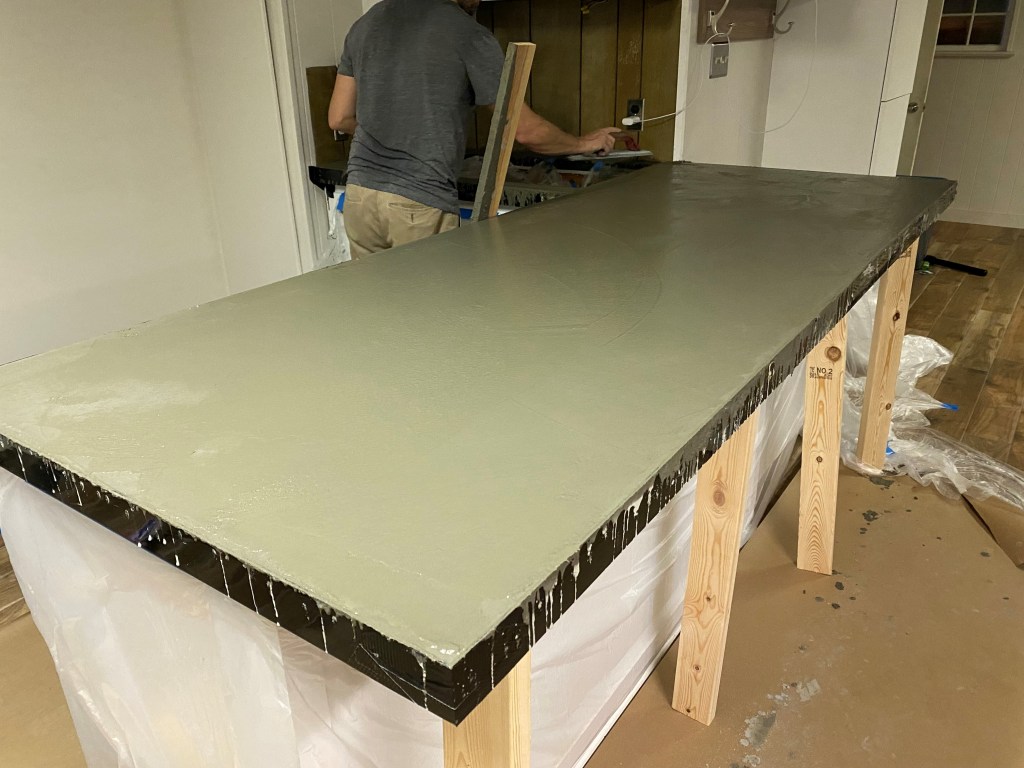
Step 6: Steel Trowel Finishing
This was the part we didn’t quite perfect – our timing was off with this step. The steel trowel is the final step before you allow it to rest and harden. Your pour needs to be set up enough, but not too much (right? Yea, exactly what we though too). I recommend watching this video for the best timing and technique for this step.
Step 7: Wait & Watch
Once you’re finished, let it rest and watch it harden and lighten for 48 hours. This is when you’ll see the “character” present itself. We have some unique striations and some pitting we think occurred as a result of Step 6, but it looks great regardless. These imperfections will be sealed after it’s fully dry. If you happen to have imperfections that need to be repaired, this brand makes repair kits you can buy and apply.

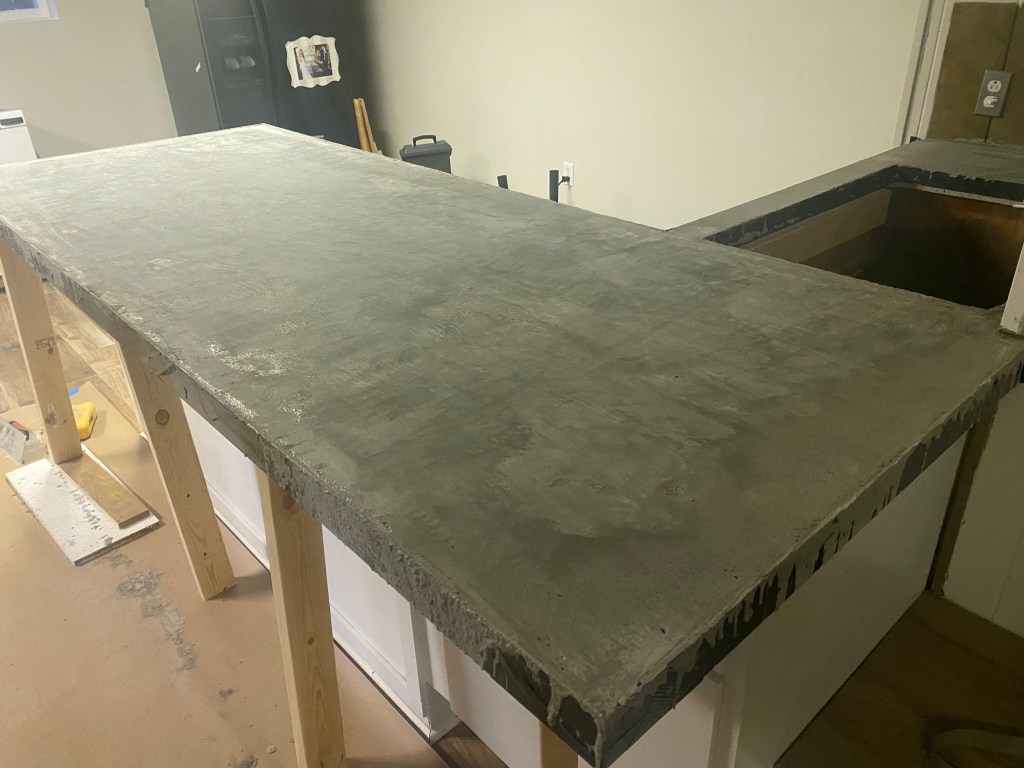
Step 8: “Pop” the Preforms
Once your pour is fully dry, it’s time to remove your forms. This was the best part of this particular system – the preforms break off revealing your countertop edges. Tip: Make sure you sand the excess hardened concrete off the top of the edges before you break them off to ensure your edges don’t chip.
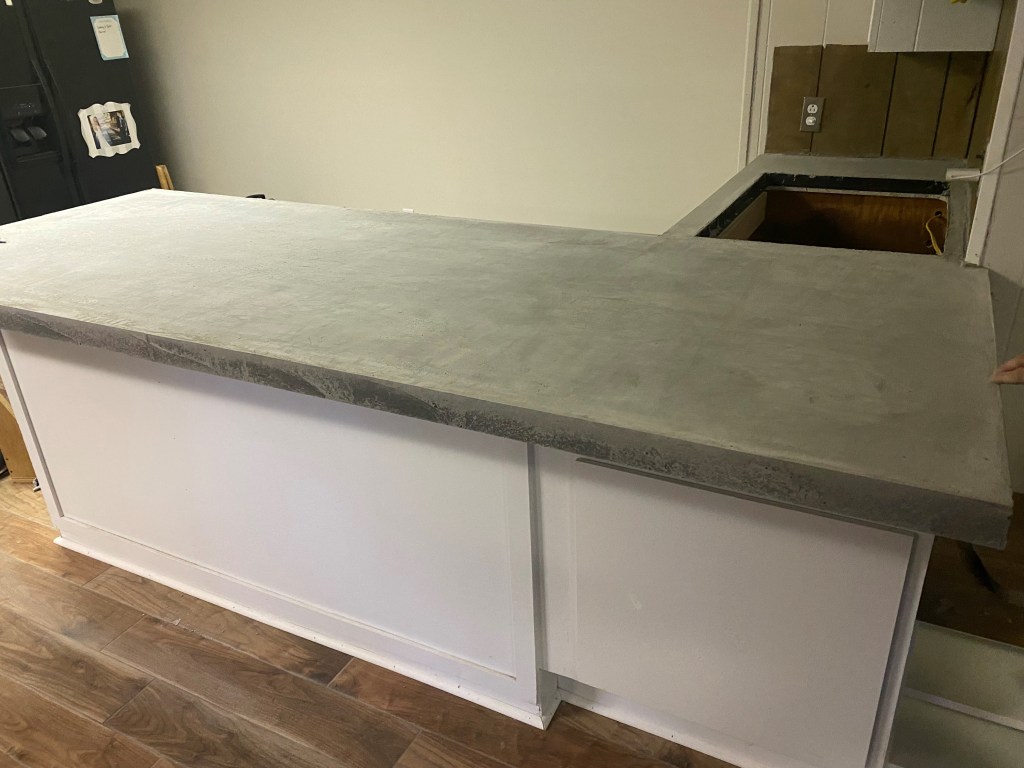
Step 9: Finished & Ready to Seal
Concrete Countertop Solutions suggests waiting several more days to ensure your concrete is completely dry and then you can seal them using a special concrete sealant for this purpose. We also added the “shine” finish as a top coat which really set it off.
Isn’t she a beaut?! Now for a fresh coat of paint on the cabinets and backsplash and this kitchenette will be a true “glow up” story. Happy DIYing – tag me in your posts if you give it a try. IG: @LindsayKeisler
Watch the video I made documenting this project HERE.
